
This post may contain affiliate links.
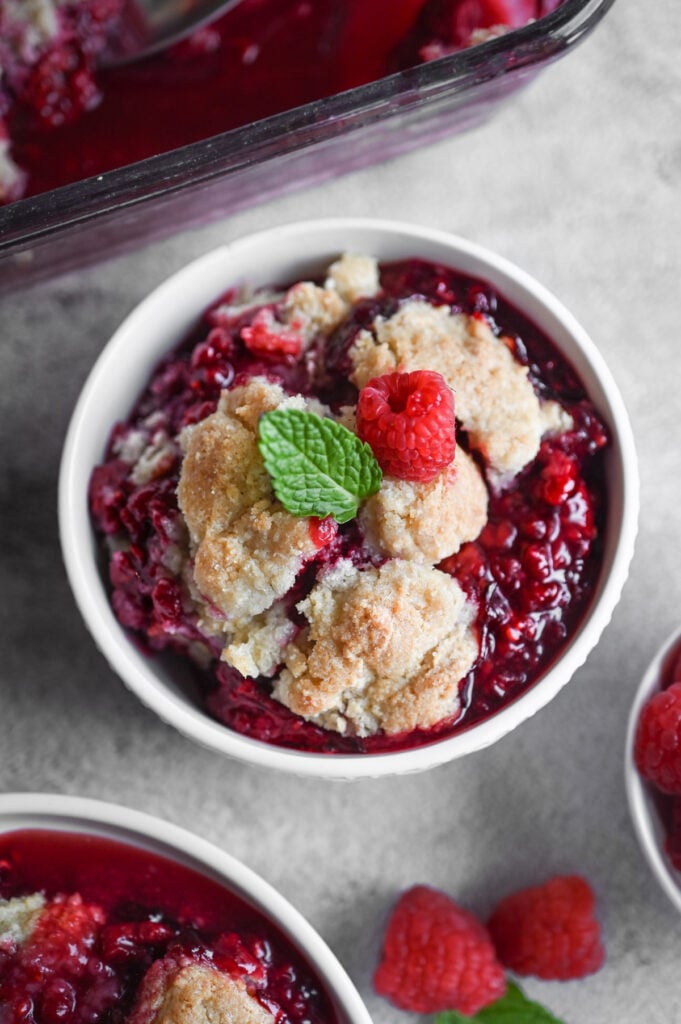
This Raspberry Cobbler has a layer of juicy, vibrant raspberries bubbling under a tender, buttery topping. It’s simple to make and always a crowd-pleaser, best served warm with a scoop of ice cream!
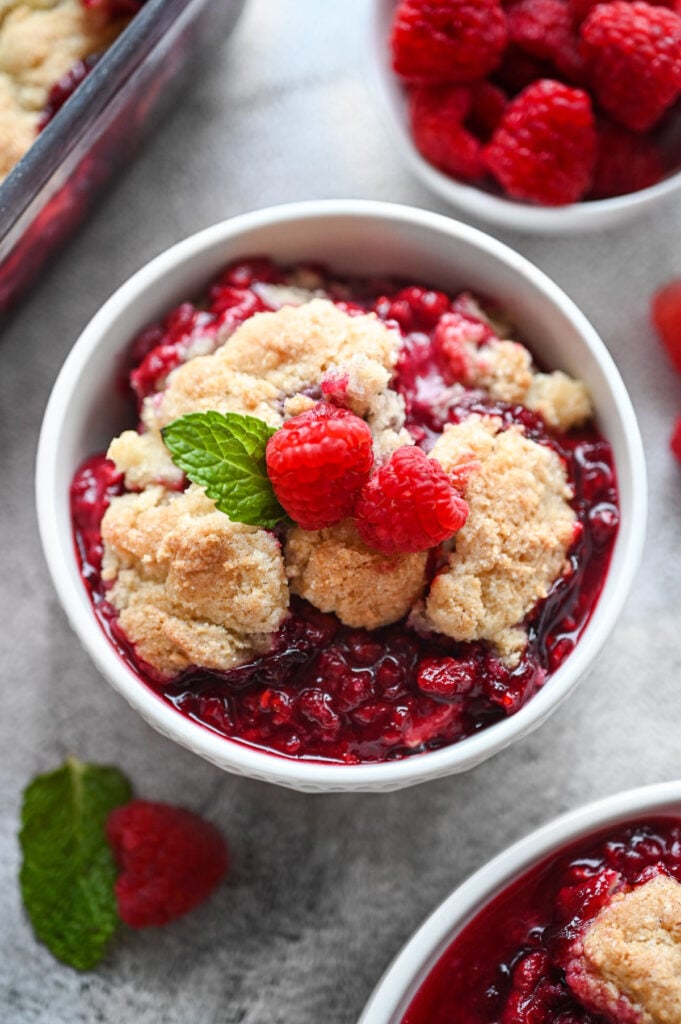
After testing this raspberry cobbler multiple ways (more on that below!), I finally found the version that works every single time! It’s bursting with juicy raspberries and has a lightly sweetened, buttery biscuit topping that’s totally irresistible!
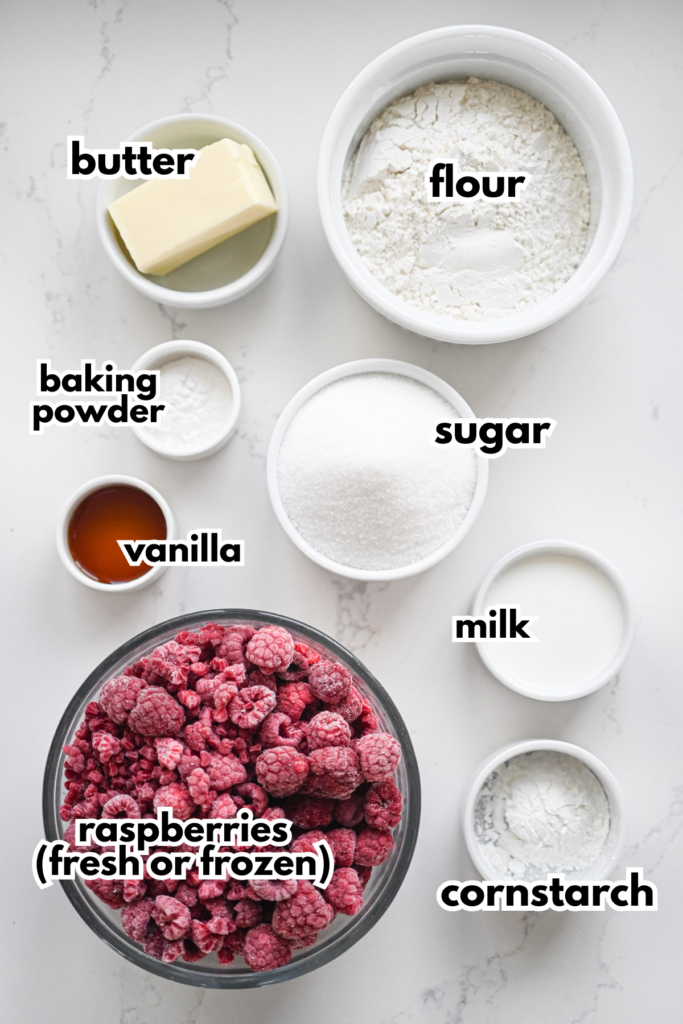
Ingredients Needed
- Raspberries – You can use fresh or frozen. More on that below!
- Sugar – You’ll need sugar for the filling and the topping.
- Cornstarch – Cornstarch is imperative to making sure the filling thickens.
- All-Purpose Flour
- Baking Powder
- Butter – I recommend using salted butter; if using unsalted butter, add 1/8 teaspoon of salt to the topping mixture.
- Milk – Any milk will work great (dairy, soy, almond, etc.)
- Vanilla Extract – Optional, but I like the hint of vanilla!
How to Make Raspberry Cobbler
Start by preheating the oven and grabbing the baking dish you plan to use (no need to grease it). I typically use a square baking dish (make sure it’s at least a a couple inches deep) or a deep dish pie plate. You could also use a cast iron skillet if you have one deep enough.
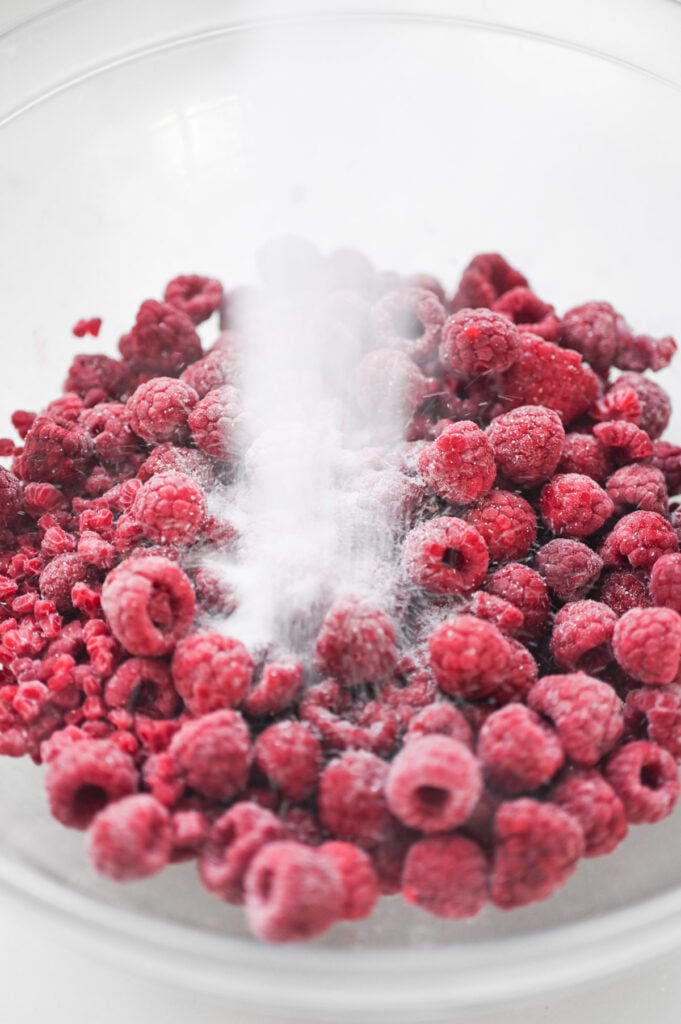
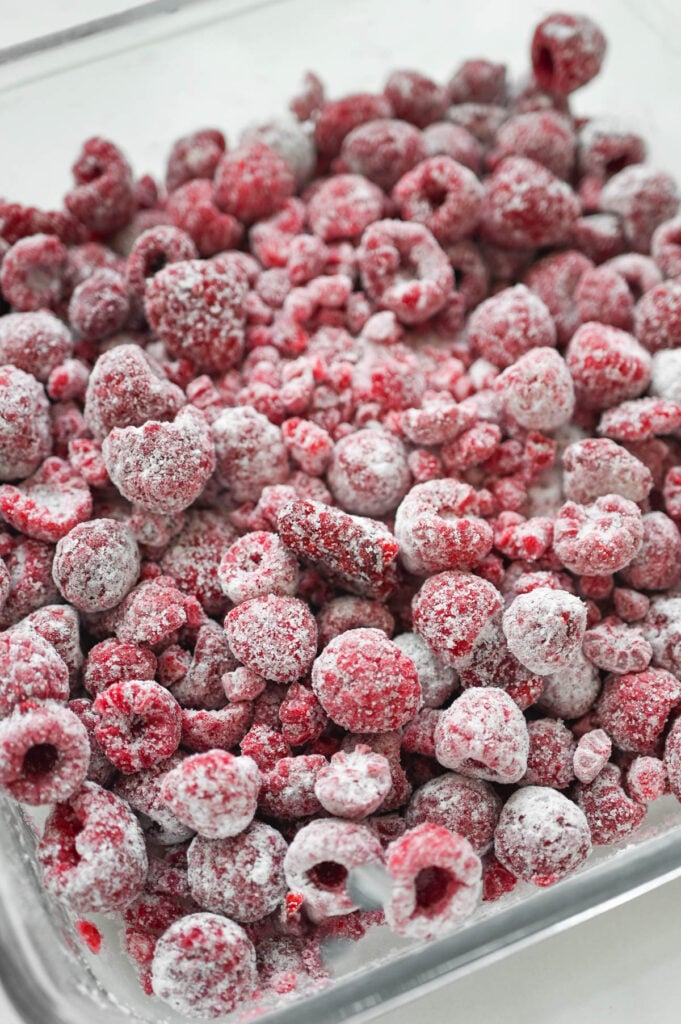
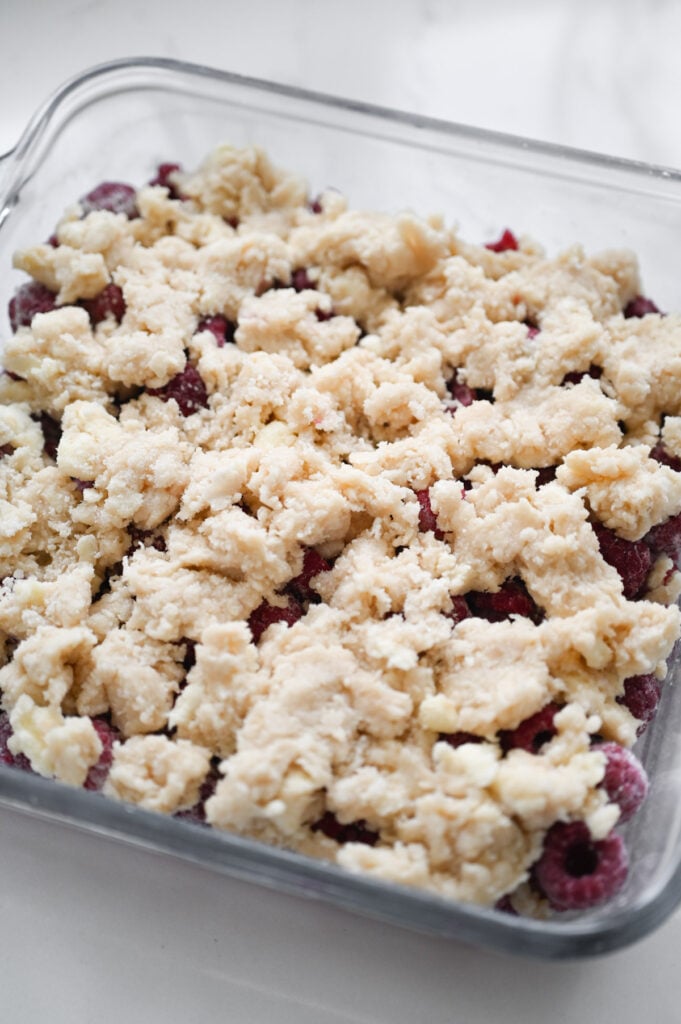
In a large bowl, combine the raspberries, sugar, and the cornstarch and stir until the berries are all coated. Pour into pan and spread to an even layer.
Baking with Fresh vs. Frozen Berries
I tested this recipe both ways – using fresh and using frozen raspberries (if using frozen, do NOT thaw). Many people worry that using frozen berries will make a watery cobbler and that’s simply not true as long as you follow the recipe and include the cornstarch. It may take a few more minute in the oven if using frozen berries, but otherwise the recipe will not change.
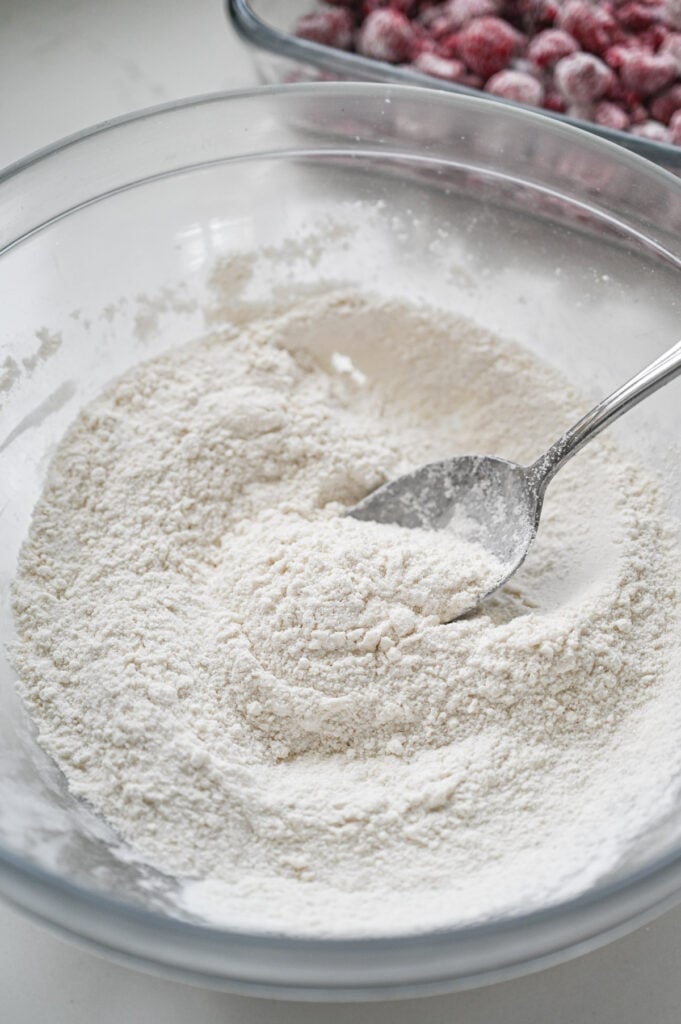
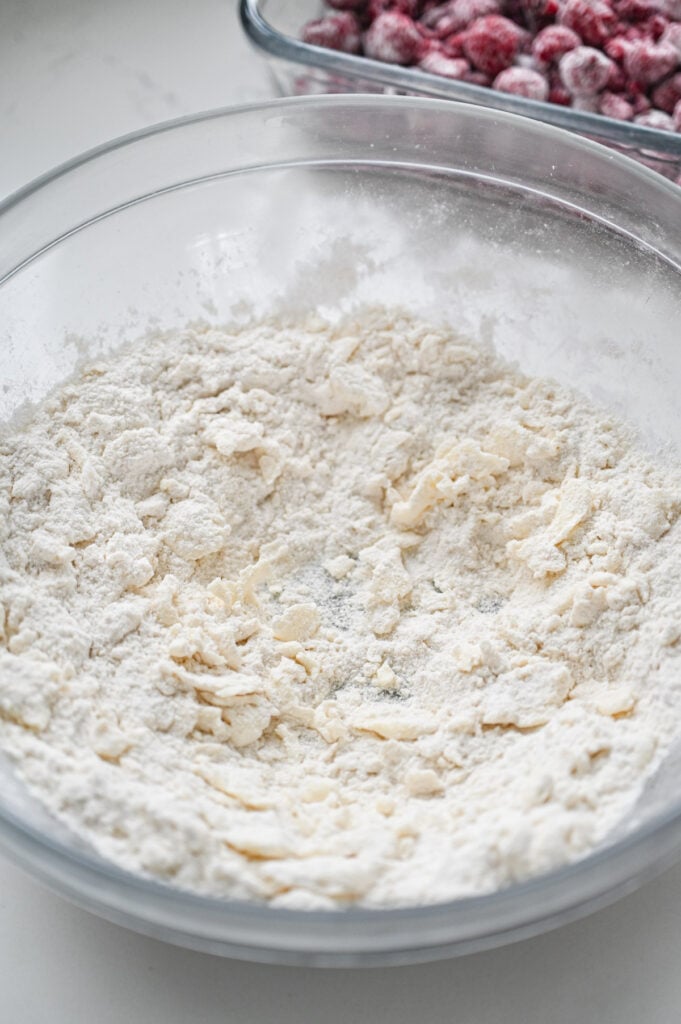
Next, you’ll mix up the topping. Combine the dry ingredients in a bowl then add the butter. You can use a fork or a pastry cutter to cut the butter into pea-sized pieces.
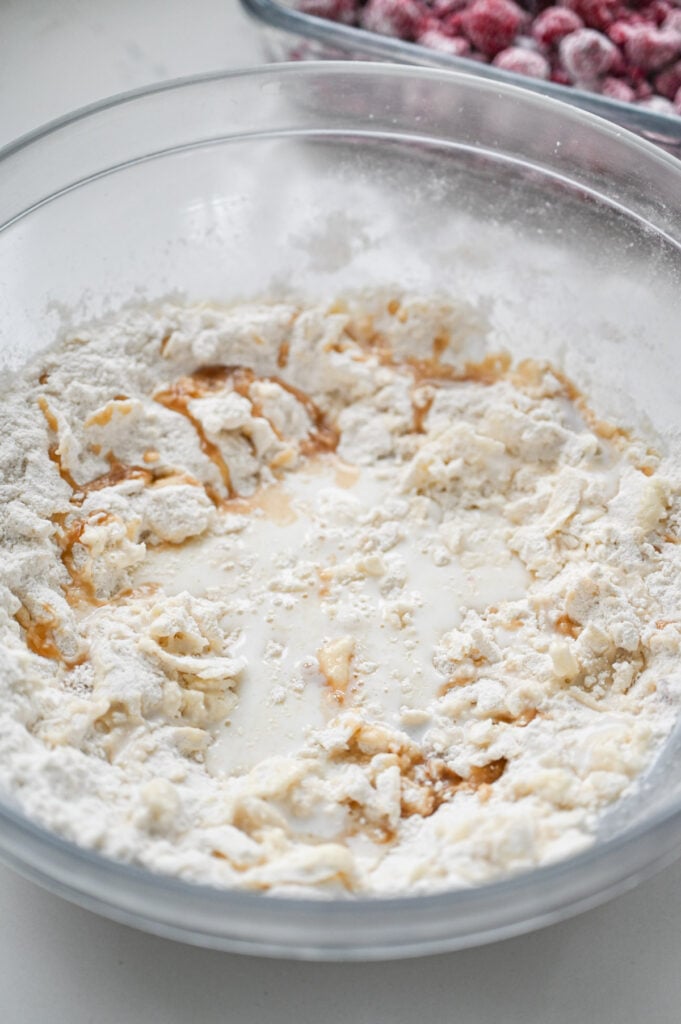
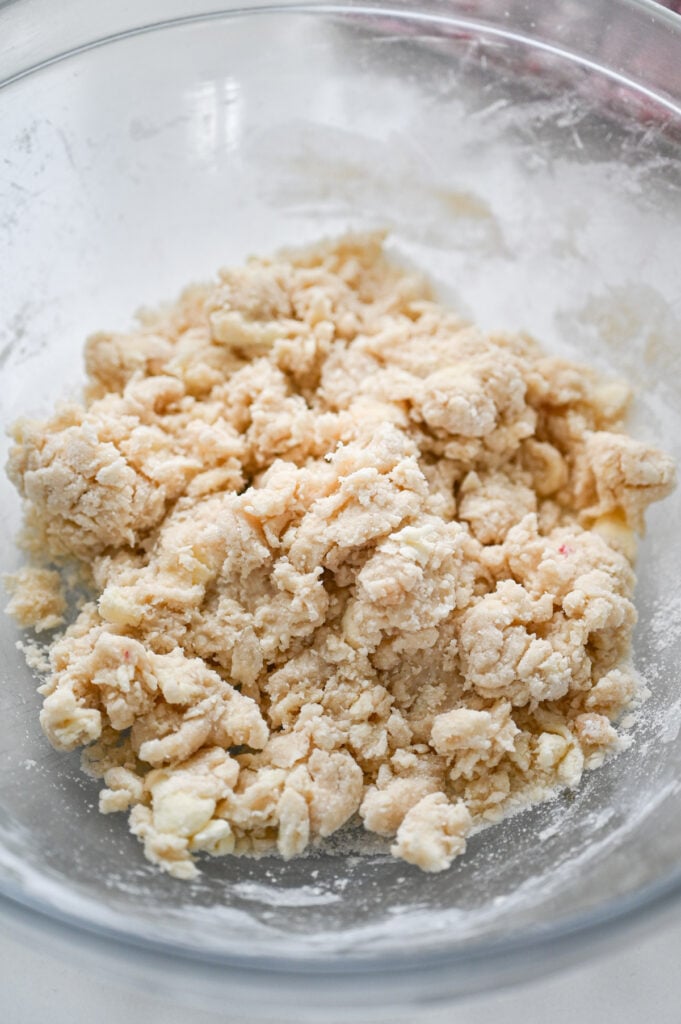
Add the milk and vanilla and use a fork to combine until a crumbly dough forms. Do not over-mix. (Over-mixing will create more gluten development and make a less tender topping!)
Use your hands to place pieces of the topping over the berries. The topping is slightly sticky – just do your best to cover all of the berries! Now it’s time to bake!
If you notice that the topping is browning before the middle of the cobbler is done, you can always place a sheet of foil over the top. This will allow the cobbler to finish baking without much additional browning.
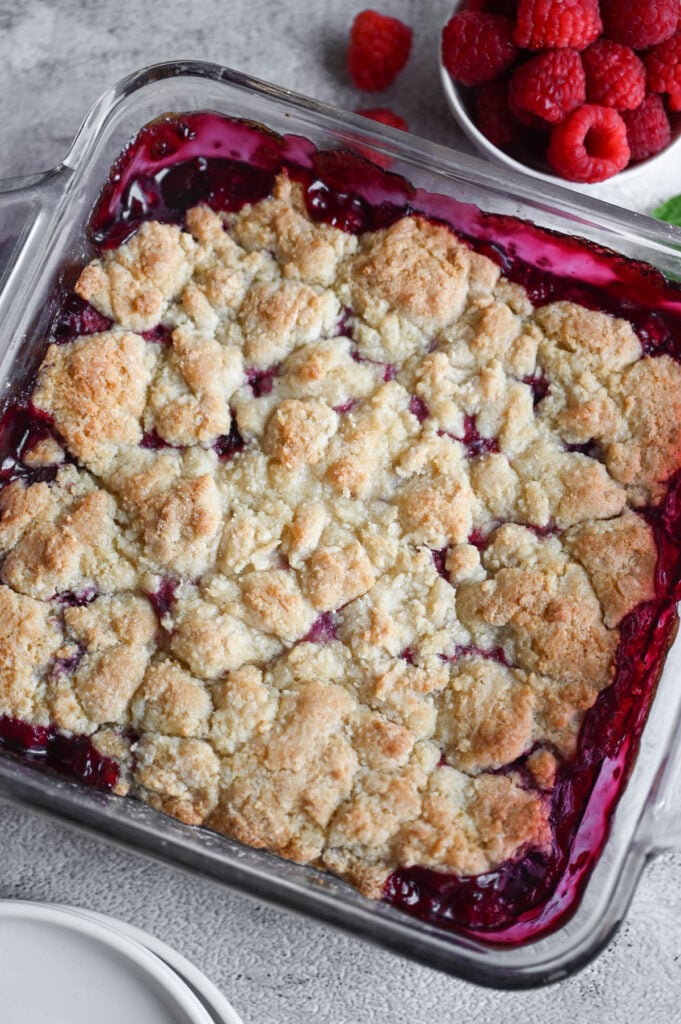
You’ll know the cobbler is done when the fruit is bubbling around the edge, the topping is golden brown, and when a toothpick pressed into the center of the topping comes out mostly clean (a few crumbs is fine).

Serving Suggestions
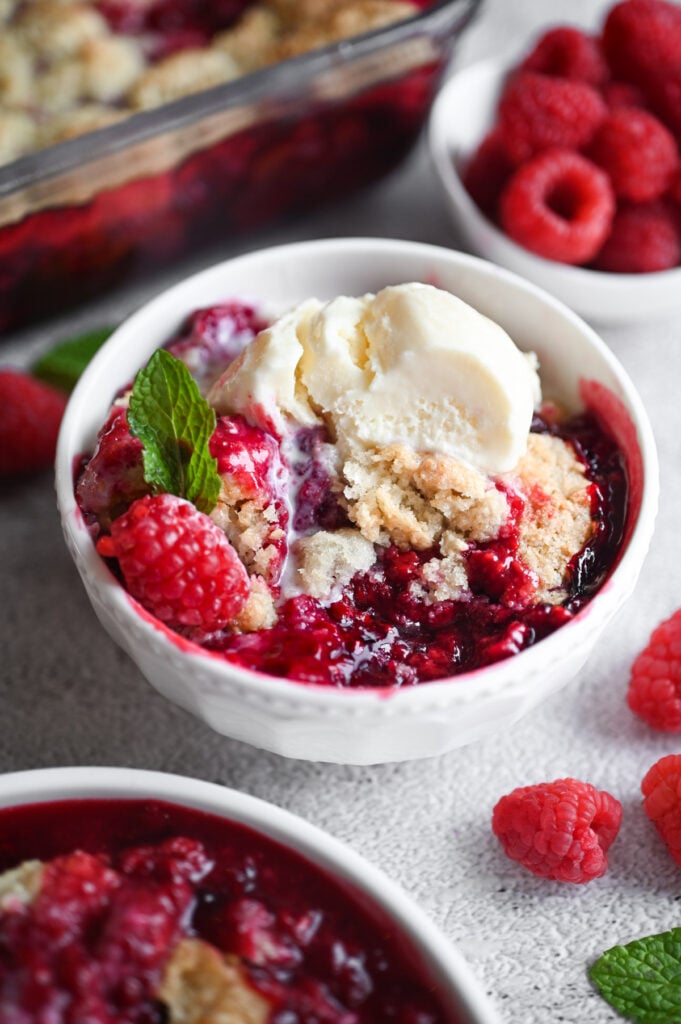
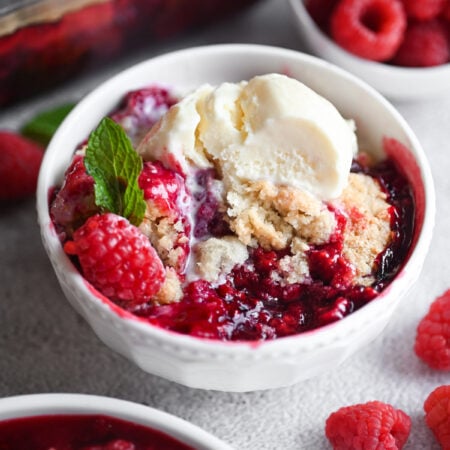
Raspberry Cobbler can be served warm, cold, or room temperature. I prefer it warm and always serve it with a scoop of ice cream or a dollop of whipped topping! It’s great as a dessert, an afternoon snack, or even brunch!
Storage Instructions
- On the Counter – If you plan to finish the cobbler within the first 24 hours, there’s no need to refrigerate it. Simply let it cool completely then cover with plastic wrap.
- In the Fridge – Leftover cobbler can be stored in the fridge for up to 3 days. The moisture from the berries will start to migrate into the topping, so just note that the texture of the topping will change over time. When ready to enjoy again, pop it in the microwave to warm it up!
- In the Freezer – I don’t recommend freezing cobbler as it just changes the texture too much! Enjoy it while it’s fresh!
Coming Up with the BEST Recipe
With my background as a sensory scientist, I simply LOVE testing recipes and figuring out what works best. I’m not looking for a good recipe, I want mine to be the best! And that’s why I test again and again before sharing my recipes with you!
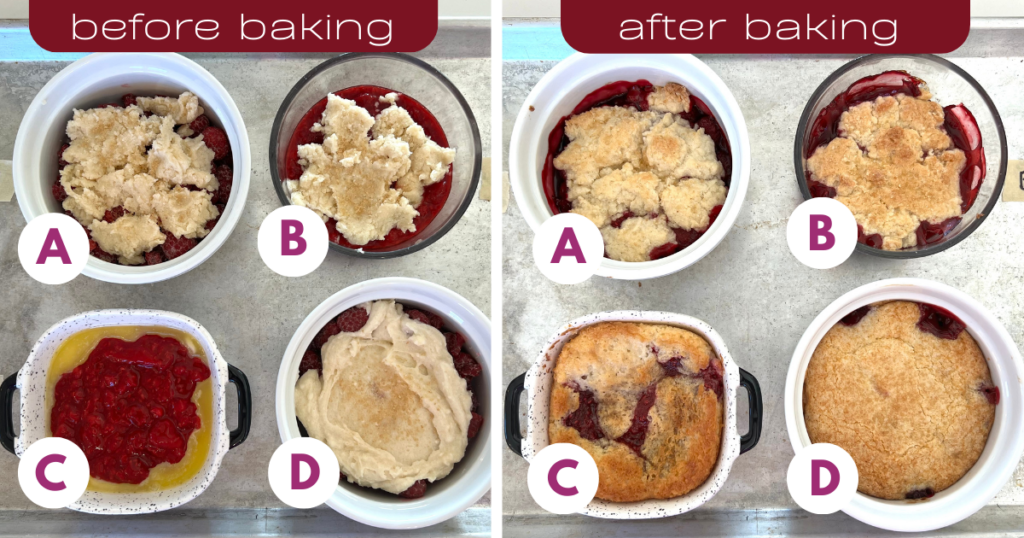
For the raspberry cobbler, I tried several variations.
- Version A – A biscuit-like topping over a frozen raspberry mixture. This one was good, but the topping got slightly soggy from the juicy berries. (I knew I needed more cornstarch!)
- Version B – The same topping as “A” but with cooked and thickened raspberry filling on the bottom. I really liked this one but when I tried a full batch, the topping sank.
- Version C – I wanted to try a version similar to my Easy Peach Cobbler. It was pretty good, but when I polled my audience, they wanted more of a biscuity topping!
- Version D – I thought maybe I could use a sugar cookie mix to make it super simple…it turned out too sweet and cake-like.
So after all this testing, I made several changes. I made sure there was enough cornstarch in the filling and added more dimension to the biscuity topping, making it more of a biscuit/cookie hybrid! A few tries later and I’m pretty darned sure it’s the best raspberry cobbler out there!!
Frequently Asked Questions
You want to bake the cobbler right when you’re done mixing and adding the topping. Why? Because the baking powder is activated once the moisture (the milk) gets to it. So, the longer you wait once the topping is mixed up, you’ll notice the topping will be less fluffy and more dense. However, you can bake it several hours before serving!
You can! However, please note that different berries have different moisture levels. Blueberries don’t tend to get quite as juicy as strawberries and raspberries. If using this particular recipe, I’d recommend using at least half raspberries and adding a mixture of blueberries, strawberries, and/or blackberries for the rest!
There are a couple things to note here… first off, make sure you added the cornstarch. If you did, then you need to make sure the filling is fully cooked. The cornstarch needs to be boiling in the berry juices to thicken. If the topping is a golden brown before it’s all fully cooked, you can cover it with a sheet of aluminum foil until it’s done. Lastly, the cobbler will set up a bit as it cools, so if it’s slightly runny right when it comes out of the oven, don’t worry about that!
Other Berry-Packed Recipes To Try!
Raspberry Cobbler
Equipment
- 1 8×8 inch baking dish or pie plate
Ingredients
Raspberry Filling
- 16 ounces raspberries fresh or frozen*
- 1/2 cup sugar
- 1 tablespoon cornstarch
Topping
- 1 cup flour
- 1/2 cup sugar
- 1 teaspoon baking powder
- 1/4 cup salted butter slightly softened
- 1/4 cup milk
- 1 teaspoon vanilla extract
Instructions
- Preheat oven to 350℉.
- Place the raspberries in a large bowl.16 ounces raspberries
- Add the sugar and cornstarch and stir to combine.1/2 cup sugar, 1 tablespoon cornstarch
- Dump the berries into the bottom of a baking dish (an 8×8-inch pan or deep pie plate) and spread to an even layer.
- For the topping, start by combining the flour, sugar, and baking powder.1 cup flour, 1/2 cup sugar, 1 teaspoon baking powder
- Add the butter and use a fork or pastry cutter to cut the butter into small pieces (pea-sized or smaller).1/4 cup salted butter
- Drizzle the milk and vanilla on top, then stir to combine. Don't over-mix. It should look like a hybrid of sugar cookie dough and biscuit dough.1/4 cup milk, 1 teaspoon vanilla extract
- Break the topping apart to sprinkle evenly on top of the berry mixture.
- Bake for 35-40 minutes or until golden brown on top and bubbly around the edges.
- Serve warm with whipped topping or ice cream, if desired!


