

This post may contain affiliate links.
These Twix Cookie Cups are soft and chewy with a gooey caramel center and a rich milk chocolate topping – basically everything you love about a Twix bar in cookie-cup form! And made with just 5 ingredients, it’s easy to whip up for any occasion!


Why You’ll Love This Recipe
If you’re tired of bringing the same old brownies or chocolate chip cookies to every party, these are such a fun change of pace! Kids cannot get enough of these and let’s be honest, adults are the same way!
Cookie cups are also the ultimate finger food. No plates, forks, or awkward slicing – just grab a cookie and sink your teeth into the deliciousness! Cookie, caramel, chocolate…what’s not to love?! Let’s get baking!
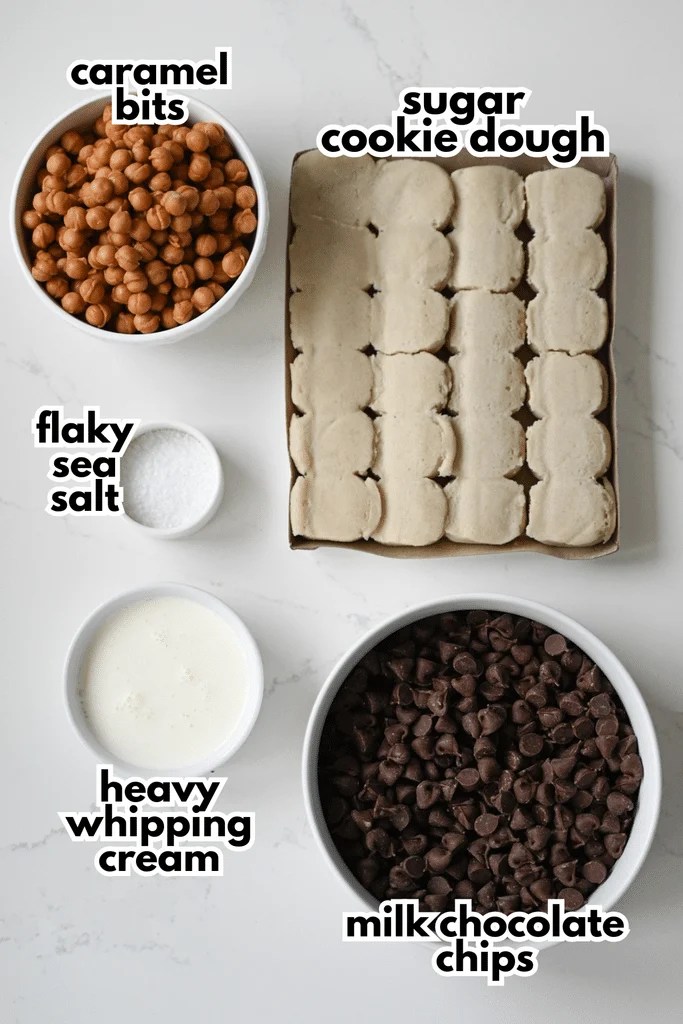
Just 5 Ingredients Needed
- Sugar Cookie Dough – You’ll use the ready-to-bake cookie dough that comes in the trays. Pillsbury is the brand I typically use. You can also make your own if you want to use my sugar cookie cups recipe!
- Caramel Bits – You can usually find these in the baking aisle. If you can’t find the bits, you can use the individually-wrapped caramels (you’ll need 35) and melt them just the same!
- Heavy Whipping Cream
- Milk Chocolate Chips
- Flaky Sea Salt

How to Make Twix Cookie Cups
Make the Sugar Cookie Cups
Start by preheating the oven and removing the dough from the package. Cut each of the 24 cookies in half so you have 48 portions.
Roll each into a circle and place in the greased holes of the muffin pan.


For this recipe, I highly recommend using a silicone muffin pan. It’s so much easier to get the cookie cups out of the pan without them falling apart or sticking to the pan!
Flatten the dough a bit then bake until golden brown.


Once the cookies come out of the oven, use a small lid (like the lid of a vanilla extract bottle) or a rounded tablespoon to press an indentation into the cookies.


Let the cookies cool for 5 minutes (longer is totally fine if you’re using a silicone pan) then carefully remove them from the pan.
Helpful Tip
If you’re using a metal muffin pan, use a thin knife to go around the outside of the cookie to loosen it. Then twist the cookie as you try removing it from the pan. If it still feels stuck, I find it works best to press down a little bit on the cookie as you twist it (so the top ring doesn’t seperate from the bottom) and twist until it comes out.


Melt the Caramel
Combine the caramels and the heavy cream in a microwave-safe bowl. Once melted and smooth, pour it into the cookie cups. I find it easiest to use a small cookie scoop to transfer the caramel to the cookie cups.
Let the caramel firm up (it won’t take long if you refrigerate it).


Dip the Cookies in Chocolate
Add the milk chocolate chips to a microwave-safe bowl. Melt slowly so you don’t burn the chocolate and make it grainy (I like to microwave in short bursts at about 50% power).
If it seems really thick, add a tablespoon or two of shortening and let it melt. This will thin it out enough to be dippable!


Dunk the cookie cups into the chocolate and let some of the excess chocolate drip off the cookie cup. If you prefer to spoon the chocolate on top, that’s an option as well.
Sprinkle with flaky sea salt while the chocolate is still wet (otherwise it won’t stick as well!). Let the chocolate firm up and enjoy!!
Storage
Store at room temperature or in the fridge for up to 5 days in an airtight container. You can also freeze them! Just place in freezer baggies for up to 2 months then thaw to enjoy!

Recipe Variations
- Make them Gluten Free – Use a gluten-free sugar cookie dough such as the Sweet Loren’s brand.
- Use Dark Chocolate – Swap the milk chocolate out for semi-sweet or dark if you prefer it!
- Add Chopped Peanuts or Peanut Butter – Add some chopped nuts in the center or swap the caramel out for creamy or crunchy peanut butter!
- Top with chopped Twix – Add some chopped Twix bars so your guests have an idea what’s inside!
- Make them festive!! Add some red and green sprinkles for Christmas or change it up for any holiday!

Other Cookie Cup Recipes

Twix Cookie Cups
Equipment
- silicone mini muffin pan
Ingredients
- 1 16-ounce package sugar cookie dough 24 count
- 1 11-ounce package caramel bits
- 1/3 cup heavy whipping cream
- 1 cup milk chocolate chips
- flaky sea salt
Instructions
Make the Cookie Cups
- Preheat oven to 350F and grease 48 mini muffin cups with cooking spray.
- Cut each of the 24 cookies in half and roll each into a ball.1 16-ounce package sugar cookie dough
- Place one in each muffin tin cup and flatten with your fingers (no need to form a "cup"….just flatten).
- Bake for about 10 minutes, or until golden brown around the edges.
- Use the cap of a bottle (I use the cap of my vanilla extract bottle) to press into each cookie to form a "cup."
- Let cool for 5 minutes in the pan and then remove to a wire cooling rack.
Make the Caramel Filling
- Add the caramel bits and heavy whipping cream to a microwave-safe bowl.1 11-ounce package caramel bits, 1/3 cup heavy whipping cream
- Microwave (or cook on the stovetop) until the butter and caramels are melted; whisk until smooth.
- Spoon about 2 teaspoons of caramel sauce into each of the cookie cups; refrigerate.
Top with Chocolate
- Add the chocolate chips to a microwave-safe bowl.1 cup milk chocolate chips
- Microwave for 30 seconds and stir. Continue to microwave in 20 second bursts, stirring after each, until smooth. Be sure not to overheat or it'll scorch the chocolate and make it gritty instead of smooth!
- To add the chocolate, you can either dip the cookie in the chocolate or spoon it on top.
- Sprinkle with flaky sea salt.flaky sea salt










I would love to try these. I don’t have a silicone pan, but wondering if mini cupcake liners would work?
Hello! I’ve never tried these in mini cupcake liners, but I feel like that should work just fine! I’d love to hear how it goes if you give it a try! 🙂 ~Kelsey
Hello, thank you for sharing. I’m making these for our Family dinner this week, how do you store them afterwards? Room temp in an airtight container or refrigerated? Also, do you need to refrigerate after you apply the chocolate?
Hi Kelly – You can store these at room temperature or in the fridge. The chocolate will harden more quickly if refrigerated, but will harden after a little more time on the counter. ~Kelsey