
This post may contain affiliate links.
These fudgy brownie bites made in a mini muffin tin are soft, chewy and have crackly tops! Made all in one bowl with simple ingredients, these brownies come together in no time!

This post may contain affiliate sales links. Please see Disclosure Policy for details.
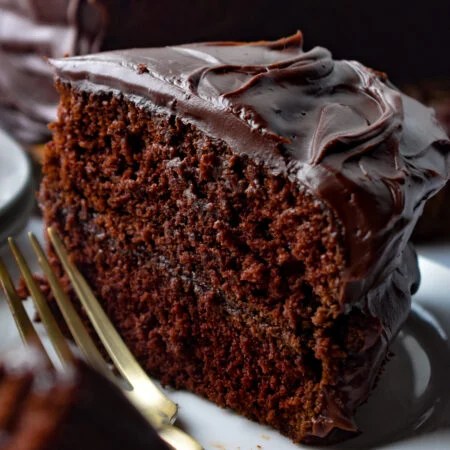
If you’re a chocolate lover like myself, you know the essentials for a delicious homemade brownie!! You need lots of chocolate flavor, a chewy center and a shiny crackly top. Though I love a big pan of brownies (and have several recipes here on my site!), there’s something so satisfying about a mini dessert!

Why I Love These Brownie Bites
- The rich chocolate flavor make these bite size brownies absolute perfection for chocolate lovers (oh hello, it’s me, ha!!)
- Made all in one bowl – yes please!! Almost as easy as just mixing up a brownie mix, but SO much better!
- Crackly brownie-like top!
- They’re the perfect size for a snack or to end the meal on a sweet note!
- Easy to customize with peanut butter, caramel, pecans, etc! More on that below…

Ingredients Needed (Full recipe in recipe card below)
- Butter – I use salted butter, but unsalted butter would work great too.
- White Sugar
- Unsweetened Cocoa Powder
- Eggs – I always use size “large” eggs when baking.
- Vanilla Extract
- All Purpose Flour
- Salt
- Mini Chocolate Chips – I prefer semi-sweet chocolate chips.
How to Make Brownie Bites
Start by preheating the oven and getting a muffin tin greased so it’s ready when the batter is!
Make the Batter
Start by melting the butter. You can do this in a microwave-safe bowl or in a medium-sized saucepan over low heat.

Once the butter is melted and still hot, whisk in the sugar. Because butter has about 20% water in it, it will dissolve some of the sugar. This will help give that desirable crackly topping on the end product….a tip I learned from Tessa at Handle the Heat.

Then, you’ll add the cocoa powder. Adding the cocoa powder to the warm mixture will help the cocoa bloom and give off more chocolate flavor!
Next, the eggs and vanilla are whisked into the batter.

Finally, the remaining dry ingredients are added and the batter is stirred just until combined.
Spoon into the Pan & Bake
Scoop the brownie batter into the prepared pan and top with chocolate chips, sea salt or whatever other toppings sound delicious to you!

Bake until the brownies are set around the edges, but the center of the brownies are still soft. DON’T OVERBAKE!
Let them cool for at least 10 minutes before removing them from the pan.

Customize the Brownie Bites!!
Something that I love about this recipe is the variety of ways you can flavor these homemade brownie bites. Here are a few ideas!
- Extra Chocolatey! Top with brownie batter with mini chocolate chips or chopped up chocolate bars (semi-sweet, white chocolate or dark chocolate)
- Add a Swirl of Flavor! Swirl the brownie batter with caramel or peanut butter before baking.
- Add Some Crunch! Top brownies with chopped pecans (or your favorite nuts), toffee bits and/or sea salt before they go into the oven.
- Get Creative!! The topping options for this recipe are endless! Add different toppings to each little bite to see which one is your fave!

Frequently Asked Questions
Having a great nonstick mini muffin pan, such as this one is key!! I also love using silicone mini muffin pans for easy brownie bite removal! You also want to be sure to give the mini brownie bites some time to cool before removing them from the pan. This will help them set up enough to be removed without falling apart!
I have not tried baking these in paper liners, so I’m not sure if they’d stick the liner or not!
Once they’ve come to room temperature, store the mini brownies in an airtight container for up to 5 days.
Absolutely!!! Let them cool completely then freeze in freezer bags for up to 3 months.
You sure can!!! This is a great way to add some color for different holidays/events. You can drizzle the with melted chocolate, add a layer of chocolate ganache or decorate with cream cheese frosting! And of course, sprinkles are always an option, too!
Yes! Simply replace the all purpose flour with the same amount of “cup for cup” gluten free flour!

Other Desserts for Chocolate Cravings

Brownie Bites
Equipment
- Mini Muffin Tin
Ingredients
- 1/2 cup butter
- 1 cup sugar
- 1/2 cup cocoa powder
- 1 egg + 1 egg yolk
- 2 teaspoons vanilla
- 1/2 cup flour
- 1/4 teaspoon salt
- 1/4 cup mini chocolate chips plus additional for topping, if desired
Instructions
- Preheat oven to 350℉ and grease a mini muffin tin with cooking spray.
- Place the butter in a medium-sized microwave-safe bowl.1/2 cup butter
- Microwave the butter until completely melted.
- While the butter is hot, add the sugar and whisk for 1 minute.1 cup sugar
- Add the cocoa powder and stir until combined.1/2 cup cocoa powder
- Next, whisk in the egg and egg yolk as well as the vanilla.1 egg + 1 egg yolk, 2 teaspoons vanilla
- Stir in the flour, salt and chocolate chips just until combined.1/2 cup flour, 1/4 teaspoon salt, 1/4 cup mini chocolate chips
- Use a cookie scoop to scoop the batter into the mini muffin tin, filling each about 3/4 full.
- Top with additional mini chocolate chips, if desired.
- Bake for 10-12 minutes, or until the top is shiny and the center is still a bit soft.
- Cool in the pan for 10 minutes then carefully remove to a cooling rack.


Going to try this today
I’ve made these 4 times in the last 2 weeks since finding this recipe, my household just loves them! They are fantastically simple to make, with easy to stock ingredients, and a relatively short bake time. These brownie bites are for sure a new staple for us 🙂
Awww I love to hear this!!! Thanks for sharing! 🙂 ~Kelsey
These are quick and easy to make and so delicious! But your advice about using a silicone pan was warranted. I don’t have one, and the brownies were difficult to remove without breaking them. I might have to put some silicone bakeware on my Amazon list, because these are definitely worth making again! Thank you for a great recipe!
YES!! The silicone pan is SO helpful with these…I use it for my Scotcheroo Bites, mini muffins and more! Glad you enjoyed this recipe! ~Kelsey