

This post may contain affiliate links.
These soft and tender Homemade Cinnamon Rolls have a sweet, flavorful filling and smooth frosting. Perfect for breakfast and brunch, these are sure to be your new go-to whenever you crave a sweet treat in the morning!

There’s nothing quite like a warm, tender cinnamon roll with frosting oozing down into the crevices. Paired with a cup of piping hot coffee or a cold glass of milk, there’s just no better way to get the day started! And though making cinnamon rolls from scratch takes a little time, it’s worth every single minute.
In the past, I bounced from one cinnamon roll recipe to another, hoping I’d land on the one. But I just never found one with the perfect tenderness and amount of filling. So I decided it was time to do a little research, a lotta baking aaaaand tasting, of course!
Fast forward many and many cinnamon roll variations later, I’ve finally got my new go-to Homemade Cinnamon Roll recipe! And lucky for you, I’m ready to share it with ya! 😉

My Process of Finding the BEST Cinnamon Roll Recipe!
It felt like a daunting task. I’ve made SO many cinnamon rolls where I like the flavor….or the texture… or the filling… etc. I wanted one that had it all! The soft, tender roll, the gooey, flavorful filling, and the perfect amount of frosting.
There were a couple of different theories I had in mind. I wanted to try incorporating a tangzhong, something I had recently learned about from King Arthur Flour. In short, tangzhong is an East Asian dough technique that makes it easier to work with and delivers softer, fluffier bread.
Though I really liked how they stayed a bit softer on days 2 and 3, I just didn’t love them fresh out of the oven as much as I loved others.
The “Surprise” Ingredient
And then there was the food scientist in my brain saying it needs some potato starch! Yep, mashed potatoes. Why? Because potato starch holds moisture better than wheat starch and actually helps the dough become easier to shape. So I tried a couple of different variations with mashed potatoes….and then things were looking up!
But then, I couldn’t forget about my grandma’s beloved cinnamon roll recipe. I’ve always LOVED her cinnamon rolls, but could never quite get them to be as perfect as she always seemed to!
I tried hers in my kitchen, and I knew exactly what I needed to do – combine a couple of different recipe variations to make the ultimate cinnamon roll recipe! And that’s exactly what I did! These have some mashed potatoes (good texture!), the warm milk from Grandma’s recipe (such good flavor!), and the ideal filling.
Key Ingredients
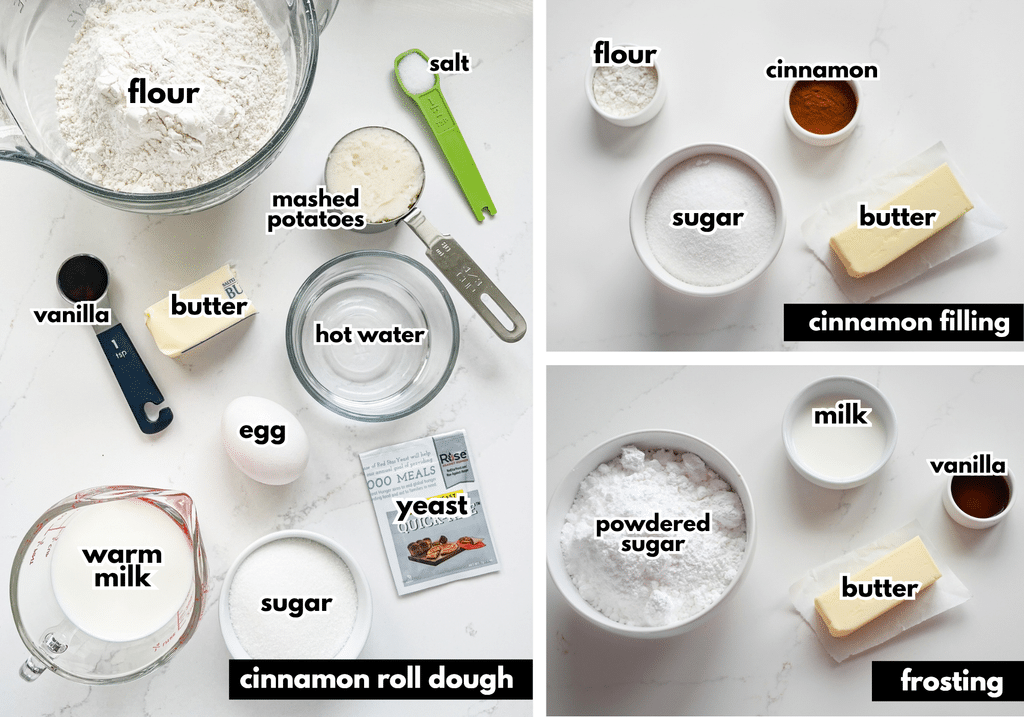
The full list of ingredients and amounts are in the recipe card below, but I wanted to draw attention to a few of them.
- Quick Rise Yeast – or instant yeast. Quick-rise or rapid rise yeast and instant yeast aren’t exactly the same, but are basically interchangeable in this recipe.
- Warm Water (110-115°F to be specific!) – This is crucial in activating the yeast. Too cold and it won’t activate, but too hot and it’ll kill the yeast.
- Milk – I would highly encourage using 2% or whole milk; it’s used in the dough and the frosting.
- Mashed Potatoes – Yes, you read that right….mashed potatoes!! Homemade or store-bought is fine; just make sure they’re smooth and don’t have garlic, onions, or other savory seasonings!
How To Make Cinnamon Rolls From Scratch
Making homemade cinnamon rolls really isn’t hard, but it does take some time. Trust me, it’s totally worth it!! First, you’ll want to activate the yeast. When the yeast is mixed with the warm water (it needs to be the right temp!) and a little sugar, it’ll begin to get foamy and rise.

Make the Dough
Then, it’s time to make the dough. You’ll mix together the warm milk, mashed potatoes, butter, egg yolk, salt, vanilla, and a little bit of the flour. I like to mix it in the stand mixer, as I find it much easier and more hands-off when it’s time to knead. Next, you’ll add the yeast mixture and the remaining flour.
The dough will be sticky, but will hold together once it’s been kneaded for a while. When the kneading is done, it won’t necessarily form a nice ball (it’s too soft for that), but when touched gently, it shouldn’t be stuck to your finger. If it is, add a little more flour and knead for a couple of additional minutes.
Place the dough in a greased bowl and cover with plastic wrap. The dough is now ready for the first “proof” or first rise. Place the bowl in a warm place until about doubled in volume. See photos below.


Make the Cinnamon Filling
While the dough is rising, you can make the filling, which is super simple. You’ll just mix the ingredients together and set it aside until the dough is ready.


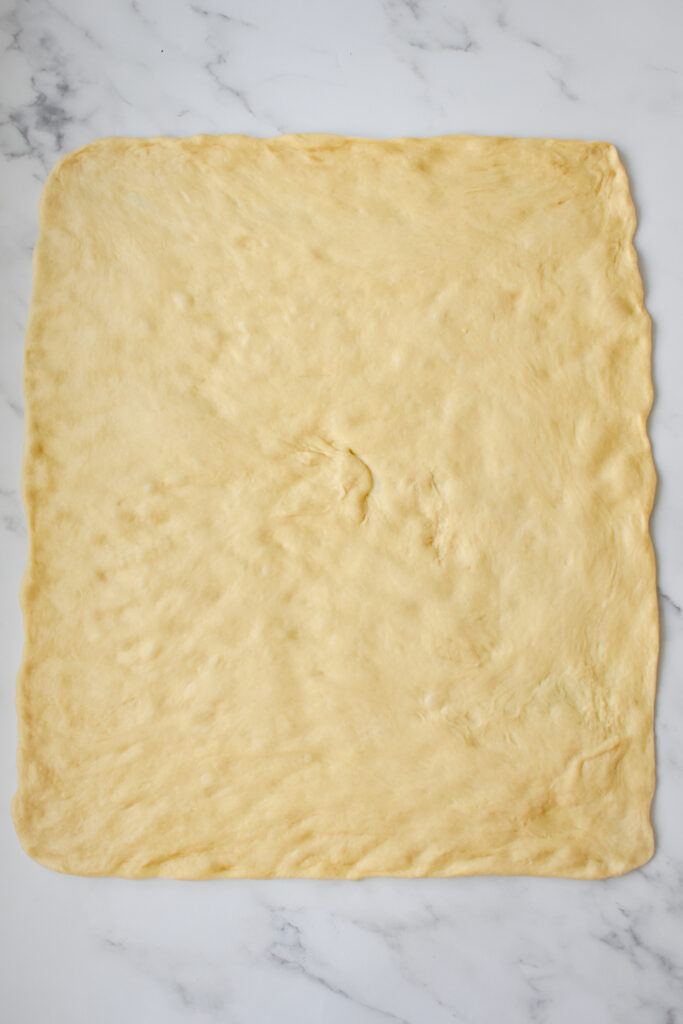
Lightly grease your work surface and hands to keep the dough from sticking as you roll it out. Spread the filling evenly across the dough, roll it up snugly, and use unflavored dental floss to slice clean, even rolls without squishing them.


Place the rolls onto a greased 9×13″ pan and cover with plastic wrap. It’s now time for the second proof. The rolls will rise in a warm place for about 30-60 minutes until puffy and noticeably larger. (You can see the size difference from beginning to end of proof in the photos below.)
Bake the Rolls
And at last, time to BAKE! Make sure the oven is preheated before putting the pan into the oven. Bake for about 18 minutes and take a look at them. If they’re a light golden brown and 190F in the center, they’re done. If not, add a couple of additional minutes and check them again.


Top with Frosting
I like to let the rolls cool for 15-30 minutes before frosting. They’re still warm enough to have the frosting melt into the rolls a bit but won’t melt completely. As you’ll see in the recipe, I give the option to use buttercream or cream cheese frosting. Although I love both, I guess I’m more of a purist when it comes to cinnamon rolls and stick with the more “plain” buttercream! 🙂


How to Store Leftover Cinnamon Rolls
I’ve heard numerous times that people love cinnamon rolls on the first day, but then they seem to get stale. Due to the potato starch in these, they are still very good a day or two later. However, I enjoy them most after a little time in the microwave, to get that fresh-out-of-the-oven appearance and texture!!
If you plan to wait to enjoy the rolls for a few days, simply pop them in the freezer (frosted or unfrosted). Then thaw, nuke in the microwave, and enjoy!!
Can I Make These Cinnamon Rolls in Advance?
Yes! You can mix them up and shape them the night before. Once they’re ready for the final rise (when they’re shaped into the rolls in the 9×13-inch pan), cover with plastic wrap and refrigerate. In the morning, let them come to room temperature and then bake!

My Favorite Sweet Breakfast Treats!
What can I say….I’ve got a raging sweet tooth! So the best breakfast in my eyes always includes something sweet! Here are my go-to’s:

Homemade Cinnamon Rolls
Ingredients
Cinnamon Roll Dough
- 1 packet (or 2 1/4 teaspoon) quick rise yeast
- 1/3 cup + 2 teaspoons sugar divided
- 1/4 cup warm water 110-115°F
- 2/3 cup very warm milk
- 1/3 cup mashed potatoes
- 1/4 cup butter softened
- 1 egg yolk
- 1/2 teaspoon salt
- 1 teaspoon vanilla
- 3 1/2 cups all purpose flour
Cinnamon Roll Filling
- 6 tablespoons butter melted
- 3/4 cup sugar
- 1 tablespoon flour
- 1 tablespoon ground cinnamon
Buttercream Frosting (Can also use Cream Cheese Frosting – see recipe in notes below!)
- 6 tablespoons butter softened
- 2 cups powdered sugar
- 1 tespoons vanilla
- 1 1/2 – 2 tablespoons milk
Instructions
Make the Dough
- In a small bowl, add the yeast and 2 tsp sugar to the water (be sure that the water is 110-115°F). Give it a stir and set aside.
- In the bowl of a stand mixer fitted with the dough attachment, add the warm milk, 1/3 c sugar, mashed potatoes, butter, egg yolk, salt and vanilla. Stir until the butter is melted.
- Add 1 cup of the flour and stir to combine.
- Pour in the yeast mixture (should have risen a bit and look foamy) and stir.
- Add the remaining flour. Knead the dough (by hand for 12 minutes) or by using the stand mixer on low speed for 10 minutes. The dough will be a bit sticky, but you should be able to touch the dough lightly with your finger and have it not stuck to your finger. (It might pull a bit, but should release from your finger). If it's too sticky, add an additional 1/4 – 1/2 cup flour and knead an additional few minutes to make sure its well-incorporated.
- Using greased hands, gather the dough into a ball and place into a greased glass bowl. Cover with plastic wrap and set in a warm place to rise for 60-90 minutes.
Fill and Shape the Rolls
- While the dough is rising, make the filling by combining the butter, sugar, flour and cinnamon; set aside.
- Once the dough has doubled in volume, punch it down and then lay it on a greased countertop. Roll the dough into a large rectangle (mine was about 17" x 19").
- Dollop the cinnamon mixture over the dough and spread carefully with the back of a spoon.
- Roll the dough up.
- Use a piece of fishing line or unflavored floss to cut the dough into 12 equal pieces.
- Place the rolls into a greased 9×13" pan. Cover with plastic wrap and let rise in a warm place for 30-60 minutes, or until puffy and noticeably larger.
Bake the Cinnamon Rolls and Frost
- Preheat oven to 350°.
- Once the oven is preheated, bake the rolls for 18-22 minutes or until a light golden brown on top and a thermometer stuck into the center of a roll registers 190°F.
- To make the frosting, beat the butter until fluffy. Add the powdered sugar, vanilla and 1 tbsp milk. Beat until smooth and creamy, adding a tablespoon of milk if needed.
- Spread the frosting over the rolls and serve warm!
Notes
- 8 ounces cream cheese, softened
- 3 tablespoons butter, softened
- 1 1/2 cups powdered sugar
- 1 teaspoon vanilla
- 1/2 – 1 tablespoon milk









Did you use instant mashed potatoes or homemade? 🙂 Looking forward to giving these a try! I have made so many different kinds of cinnamon rolls and love to try new recipes!
I hope you do give these a try – I love how pillowy and soft they are!! 🙂 I’ve used both. I’ve used leftover homemade potatoes and I’ve used instant mashed potatoes (not dry, but once it’s mixed). Both work great! I’d love to hear what you think of these if you get a chance to make them! 🙂 -Kelsey
These are the softest, gooiest cinnamon rolls ever — my new favorite! I probably won’t wait until I have leftover mashed potatoes again to make these. I did use brown sugar for the filling because I like the flavor, but otherwise followed instructions exactly. The addition of flour to the filling is genius! I’ve never seen that before but it makes so much sense; it keeps the filling from leaking out of the rolls during baking. The cream cheese frosting is perfect — tangy and not too sweet. And the instant yeast really sped up the process. No need to ever look at other cinnamon roll recipes again.
Kelsey, I’ve been searching for a recipe like my grandma made using mashed potatoes and I want to say thank you for this delicious recipe. I’ve never made homemade rolls before, but your recipe was so easy to follow. They were amazing!
I’m so happy to hear, Peg!! So glad you enjoyed them! 🙂 ~Kelsey
Can you make these the night before?
Yes! You can mix them up and shape them the night before. Once they’re ready for the final rise (when they’re shaped into the rolls in the 9×13-inch pan), cover with plastic wrap and refrigerate. In the morning, let them come to room temperature (they’ll raise a bit) and then bake! ~Kelsey
When ready to bake in oven pour heavy cream over the cinnamon rolls then bake
I’ve tried this before and it is quite tasty! Definitely makes for a gooier bottom! ~Kelsey